(embiggenable) • iPhone
(embiggenable) • iPhone
(embiggenable) • iPhone
(embiggenable) • iPhone
In a comment left on my entry, good things can come in small packages, Clifford Gwinn wrote:
Wow, didn’t know those files could go that large.
my response: To be honest, I didn't know that either until I discovered the Preserved Details option in the PS IMAGE SIZE tool. That written, I had been printing iPhone pictures up to 16x16 inches with great results. However, I'll let you in on a secret ...
In my personal picture making work, all of my influences are derived from the so-called Fine Art photography world. In particular, notions about print size and related "quality". Back in the 70s Jeff Wall was spreading the word that, to be considered the equivalent of painting, photographs needed to be presented in a large scale. In Wall's case that meant print sizes of up to 30 feet in length and, typically, 18-20 feet in length. I saw his retrospective at MOMA.
Then there is Edward Burtynsky who photographs sweeping scale landscapes and typically prints up to 50-64 inches (length). I saw his Quarries gallery exhibit. Andreas Gursky, who prints in the 12 ft+ range is another go-big guy. And the list goes on and on and, over the years (actually, decades), I have viewed a significant number of go-big fine art photography prints.
All of those go-big prints had one characteristic in common. That is that they were all enlarged to a size well beyond that that would be proscribed, considering the originating file format, for displaying (up close) picture sharpness / resolution. The other thing they had in common was that, when viewed from a "proper" distance, they were all wonderfully impressive.
What I learned from that experieince is that, no one-to include photographers, curators, buyers, et al-in the Fine Art Photography World gives a rat's ass about "sharpness". At least so, not as it is currently defined in the digital picture making era. iMo, that's because I have yet to see a viewer (in a Fine Art gallery or museum), to use a modern term, "pixeling peeping" or, perhaps "grain/sharpness peeping".
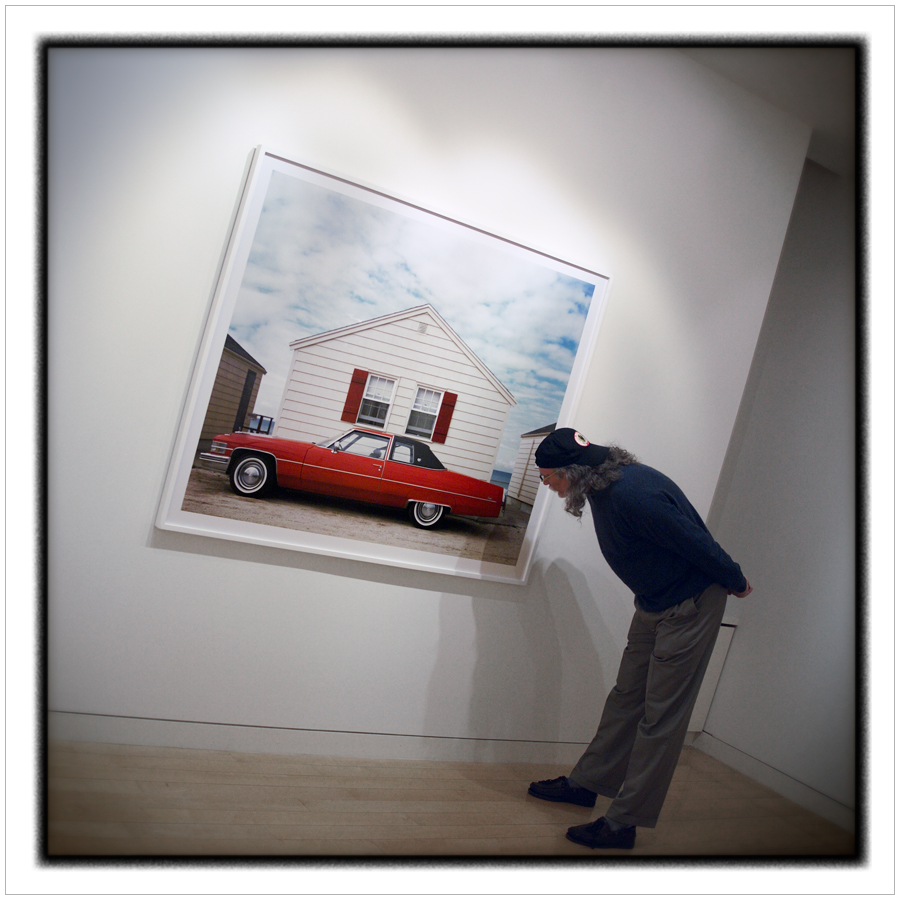
me pretending to peep a Meyerowitz print
In the Art World, the prevailing pardigm, re: viewing a photographic print, is to view a print from a distance which allows the viewer to see the print in its entirety in order to experience the look and feel of the picture maker's intent in its totality. Or, to write it another way, the "beauty" is not in the details, it's in the whole.
So, for my eye and sensibilities, when I write that I am getting great results from printing iPhone pictures at large size, one should realize that I am not after state-of-the-art sharpness / resolution. That written, it is accurate to write that, nevertheless, those prints do display very good sharpness / resolution.
Glifford also asked:
...what phone app do you use and do you sharpen your files for print (liquid)?
For most of my picture making, I use the box-stock iPhone camera module and its associated software. For my file processing on the iPhone / iPad I use Snapseed. For low-light picture making, I have been experimenting-see pictures in this entry-with various camera apps to find one which creates better low-light files than the iPhone software. To date, I am using VSCO which does a good job of it.
File sharpening-most often low to moderate-is performed on a case by case basis. It should be noted that, when I do apply sharpening, it is always done after I have converted the file to LAB colorspace where the sharpening is applied only to the grayscale channel, not to the the color channels. This technique allows for a higher level of sharpening without creating the sharpening artifacts that would be created at the same level sharpening in RGB colorspace. After sharpening the file is converted back to RGB color space.

